Introduction
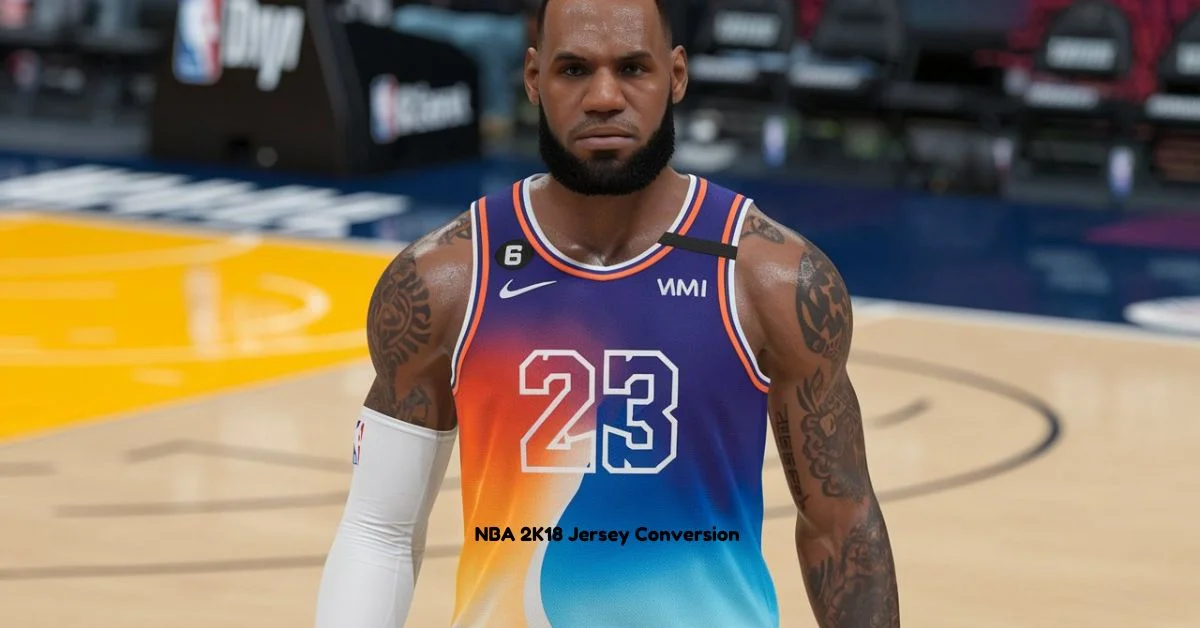
NBA 2K18 Jersey Conversion is known for its realistic gameplay, dynamic visuals, and customization potential. One unique feature that makes this game popular among modders is the ability to convert and customize jerseys. Customizing jerseys not only adds a personal touch to gameplay but also allows players to explore new creative dimensions by experimenting with different team aesthetics. This guide will walk you through the entire process of converting jerseys in NBA 2K18, from extracting files to designing custom textures and troubleshooting common issues.
Why Convert Jerseys in NBA 2K18?
Customizing jerseys in NBA 2K18 offers several benefits beyond just the visuals:
- Enhanced Realism: Modding enables players to recreate updated jerseys, offering a closer alignment with current NBA team uniforms.
- Nostalgia: You can pay homage to classic NBA teams by bringing back throwback jerseys from iconic eras, allowing for historical recreations.
- Unique Aesthetics: Add a personal touch by designing unique jerseys that showcase your creativity or align with your team’s theme.
- Community Engagement: Sharing custom jerseys with online communities can connect you with like-minded players and give you feedback.
These possibilities make jersey customization an engaging and rewarding aspect of NBA 2K18.
Essential Tools for NBA 2K18 Jersey Conversion
For a smooth jersey conversion experience, gathering the right tools beforehand is crucial. Here’s a list of essential software and resources to get you started:
- NBA 2K18 Explorer: A modding tool designed specifically for accessing and modifying NBA 2K18 files. It allows players to open game directories, locate jersey files, and export or import modified textures.
- Looyh’s NBA 2K Tools: Another popular tool for modding that provides advanced functions, such as batch exporting textures. It simplifies the process of making and testing multiple modifications quickly.
- Image Editing Software (e.g., Photoshop, GIMP): These programs are critical for editing jersey images and logos. They allow you to make precise adjustments, add custom designs, and ensure the textures fit within NBA 2K18’s requirements. Photoshop is the industry standard, but GIMP is a free alternative that works well.
- Jersey Templates: Access templates that offer a structured starting point for designing jerseys. Many community sites like NLSC Forums and ModdingWay provide free templates, helping to maintain consistency in size and proportion for NBA 2K18 Jersey Conversion.
- 3D Viewer (Optional): For those who want to preview designs in 3D before testing in-game, Blender or similar software allows for detailed previews, ensuring that jersey textures look good from every angle.
- Community Resources and Tutorials: Forums such as NLSC and Operation Sports have active NBA 2K modding communities where you can find tutorials, troubleshooting tips, and feedback on your designs.
Step-by-Step Guide to Converting NBA 2K18 Jerseys
Step 1: Extracting the Jersey File
To begin the customization process, you need to extract the desired jersey file from NBA 2K18 Jersey Conversion.
- Locate the Game Directory: Open NBA 2K18 Explorer and navigate to the game’s installation folder where textures and jersey files are stored.
- Access the ‘Jerseys’ Folder: Within the directory, locate the
jerseysfolder, which contains files for each NBA team. The files are labeled with team abbreviations, such asLALfor the Los Angeles Lakers orNYKfor the New York Knicks. - Export the File: Select the jersey file you want to customize and export it in
.iffformat. This file will serve as the foundation for your custom design.
Step 2: Designing and Editing the Jersey Texture
With your file extracted, it’s time to create the custom look. Open the file in Photoshop, GIMP, or another image editor:
- Set Up Layers: Create different layers for team logos, numbers, and any design elements. This ensures flexibility if you need to make adjustments.
- Apply Custom Colors: Use the color palette to experiment with team colors or create new color schemes. For an authentic NBA feel, try to match the official RGB values of the team colors.
- Add Logos and Details: Place team logos, sponsors, or any unique graphics onto the jersey. Make sure each element is properly scaled and positioned.
- Check Texture Resolution: NBA 2K18 uses high-resolution textures (typically 2048×2048 pixels). Ensure your design matches these dimensions for the best in-game appearance.
- Save the File: Save your edited jersey in
.iffformat, which can be re-imported into the game.
Step 3: Re-importing and Testing the Jersey in NBA 2K18
Once you’ve completed the design, you need to replace the original jersey file in NBA 2K18.
- Re-import Using NBA 2K18 Explorer: Open NBA 2K18 Explorer, locate the original jersey file, and replace it with your customized
.ifffile. - Save Changes and Launch the Game: After saving, launch NBA 2K18 and check if your custom jersey appears correctly. If there are any issues, you can return to your editing software to make adjustments.
Advanced Tips for a Professional Look
- Texture Mapping: Properly align textures to avoid distortions when the jersey moves in-game.
- Use Subtle Gradients and Shadows: To add realism, apply soft gradients and shadows, especially around seams and logos. This can make the fabric appear more authentic.
- Add Wear and Tear: To give the jersey a game-worn look, add subtle creases or wear patterns, mimicking real-life textures.
- Layered Effects: Use blending modes to create smooth transitions between elements like numbers and logos.
Troubleshooting Common Issues in NBA 2K18 Jersey Conversion
Customizing jerseys can sometimes lead to unexpected issues. Here are solutions to common problems:
- Blurry Textures: Ensure that your file resolution is high (2048×2048 pixels). Blurry textures can also result from incorrect export settings; always save with high-quality export options.
- Color Differences in Game: Colors may appear different in NBA 2K18 compared to your editing software. Adjust RGB levels or test with different monitor settings.
- File Not Loading: If the game doesn’t load the custom jersey, check that the
.ifffile format is correct. Re-import the file using NBA 2K18 Jersey Conversion. - Transparency Problems: Make sure that any transparent areas in your design are correctly configured; missing transparency can lead to visual issues on the jersey.
Leveraging Community Resources for Further Customization
The NBA 2K modding community is a valuable resource for expanding your skills and sharing your work. Consider joining these platforms:
- NLSC (National Basketball Simulation Center): This forum is an excellent place for tutorials, modding resources, and discussions about customization.
- ModdingWay: A site offering downloads and tutorials on modding various sports games, including NBA 2K18.
- Operation Sports: Known for its active sports game community, this forum offers tips, showcase threads, and help for beginners.
Engaging with these communities can help you learn advanced techniques and receive constructive feedback on your work.
Conclusion: Enhance Your NBA 2K18 Experience with Custom Jerseys
Mastering jersey conversion in NBA 2K18 not only personalizes gameplay but also brings a unique layer of creativity to the game. By using the tools, resources, and tips provided in this guide, you can create professional-quality jerseys that showcase your style. Whether you’re designing a retro team look, a fresh modern twist, or a fantasy creation, jersey customization offers endless possibilities for enriching your gaming experience.
Also Read: Seraphina CZ Paperclip Bracelet: A Timeless Fashion Statement


